Build a personal site describing you and your final project.
Upload it to the class archive.
Work through a git tutorial..
Status of the assignments
Build a personal site describing you
Build a page for final project
Upload it to the class archive
Work through a git tutorial
xx
Summary of the week
During first week I did register to GitLab, signed up to FabLabs.io, created this website by using Dreamweaver and Bootstrap as a template, and synchronized it to GitLab repository.
The first week involded little bit learning, because Git wasn't very familiar for me. I have had used it download plugins to my Volumio music player only. CSS and htmls were already familiar for me, but I was positively surprised how efficient UI frameworks are noawadays (I did get familiar with Bootsrap)
Anyway, most of the tasks were already familiar for me, challenges are waiting me in the future assignments :)
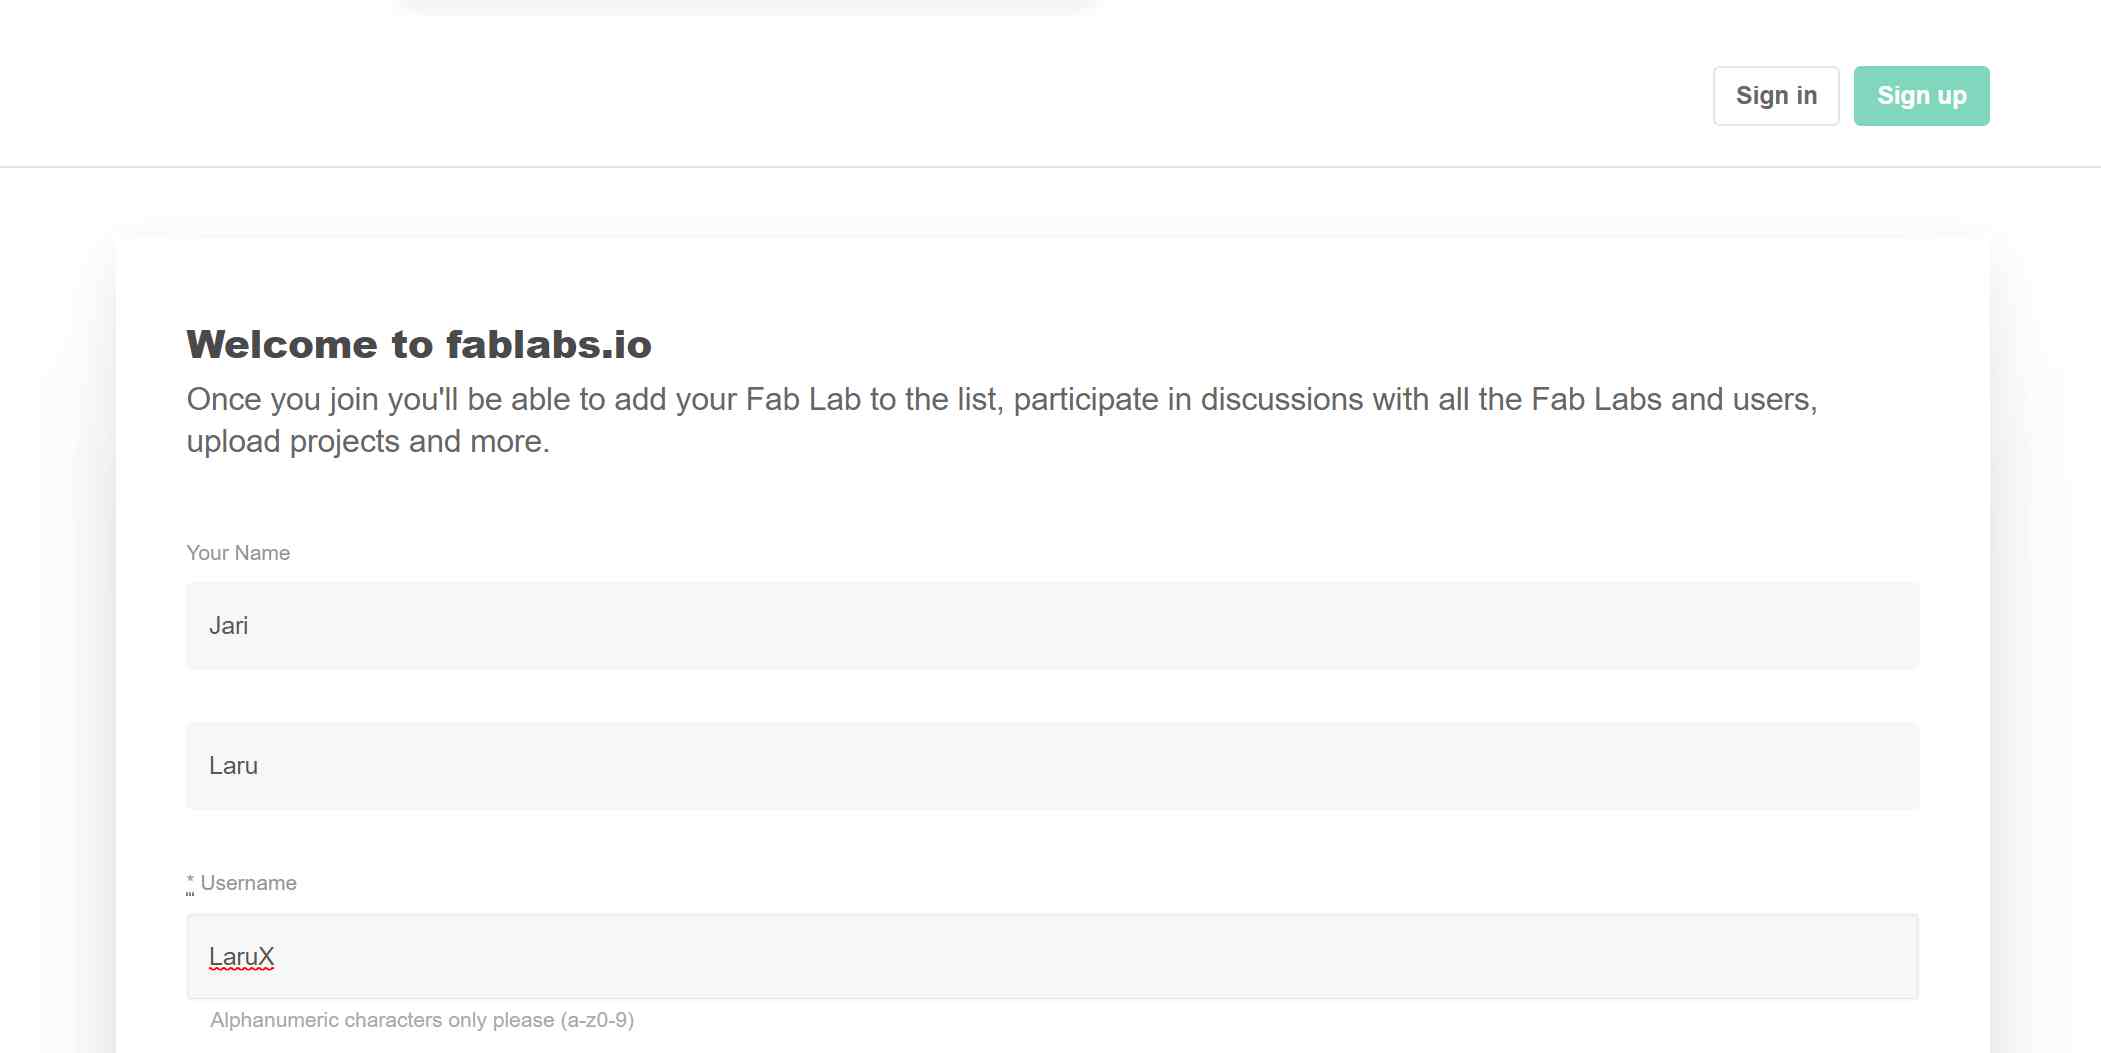
FabLabs.io
First of all, I did create my personal account to FabLabs.io service by using certain email address "my.email@example.com".
Description of the GIT process
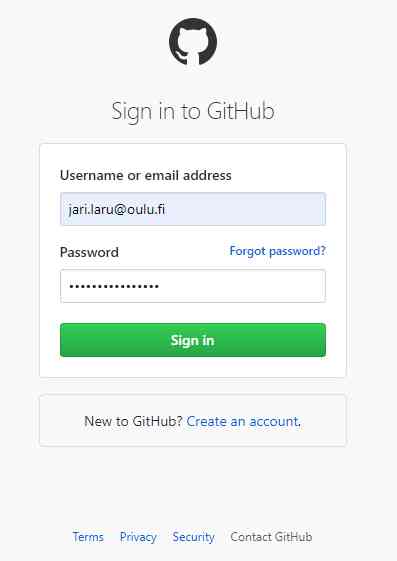
Next step was to create account for GitLab used in FabAcademy. GitLab is a one of the most popular distributed version control systems, which was new platform for me. I have used earlier webdav, rsync, ftp, sftp etc. for filetransfer, but for some reason, git was new tool for me.
Then I did install different Git tools for Windows. First I started with Git for Windows, then I did install also Linux Subsystem for Windows (Ubuntu distro) and Finally I downloaded Adobe Dreamweaver with integrated Git from Adobe CS Cloud. I will explain those tools in forthcoming sections.
Basics of the Git with Git tools for Windows
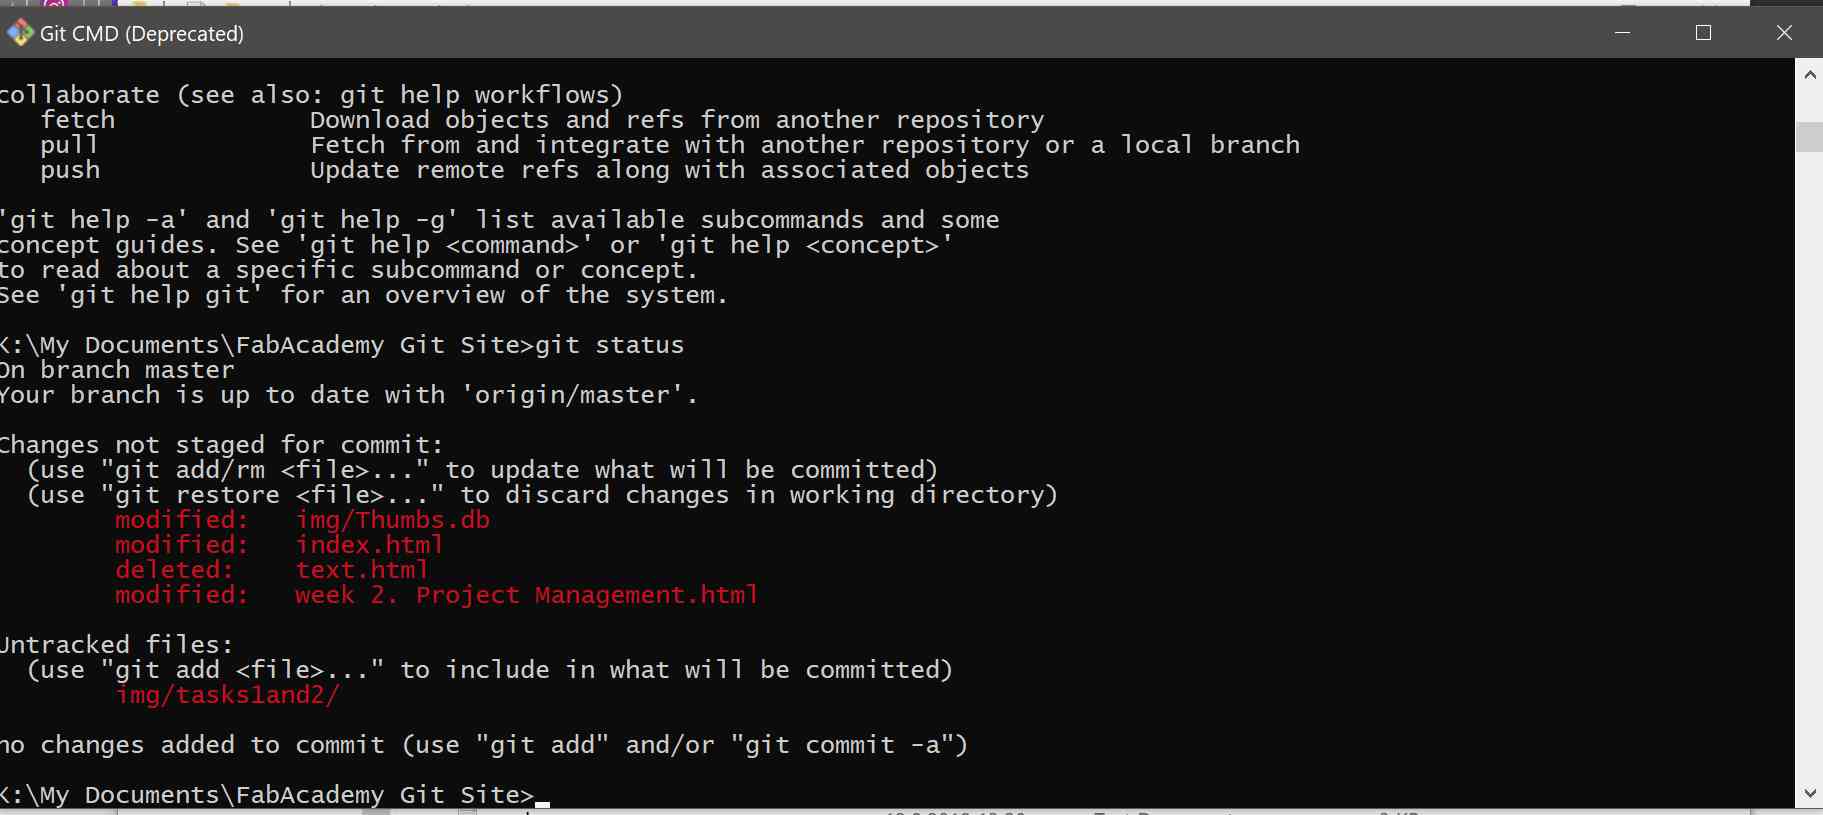
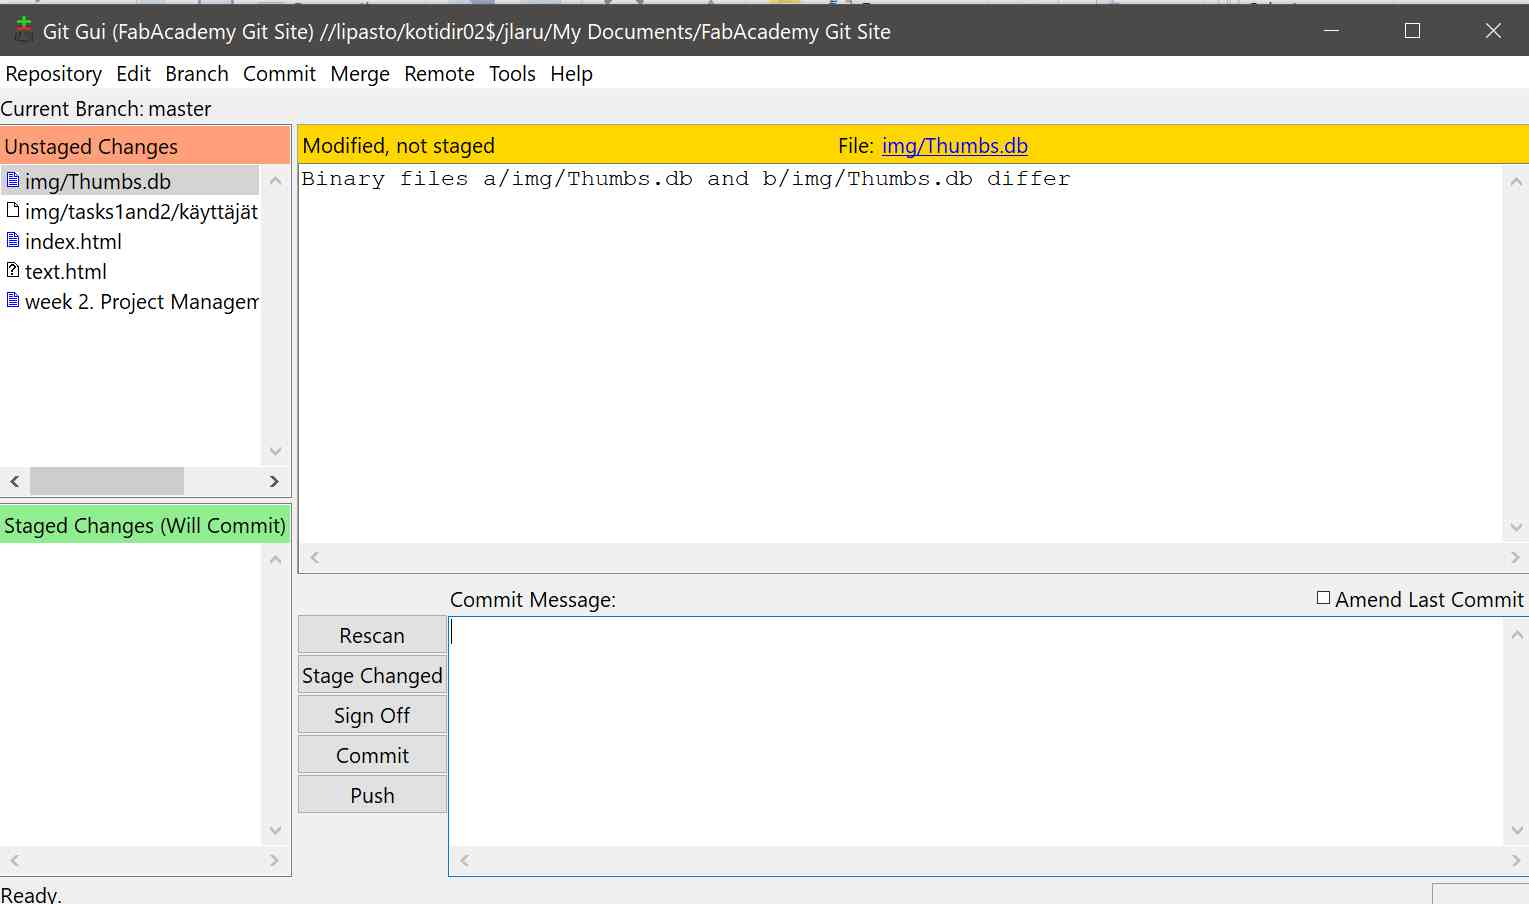
Git for Windows has a command line tool, with Bash Console for written commands, and graphical user interface which will be integrated into normal Windows 10 user experience.
Phase 1. Getting started - configuring Git and creating SSH keypairs
I did start my journey in the world of Git by typing following commands (same email that I used for GitLab)
For pushing changes to a GitLab server and pulling content from GitLab served I had to create SSH key pair, which allowed me to be authenticated automatically to the GitLab remote server (without login each time). Following GitLab and SSH keys guide and using Git Bash I generated a SSH key pair involving a private and a public keys, and added them to Git.
Then I went to My Documents folder to get public key, which was then added into settings of GitLab server.
Then I went to change settings of my GitLab account and navigated the section "SSH keys" to add public-key that I got from Git. By using this approach I can avoid of using my user account and password each time when using Git
SSH public-key authentication relies on asymmetric cryptographic algorithms that generate a pair of separate keys (a key pair), one "private" and the other "public". You keep the private key a secret and store it on the computer you use to connect to the remote system (Random www-page as a source: https://kb.iu.edu/d/aews)
Phase 2. Cloning GitLab and creating local repository in my computer
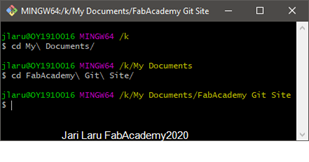
Next I cloned repository from remote repository (gitlab) to my laptop for creating local repository. First I went to folder that I want to use with FabAcademy site by typing following commands on Git Bash console
Then I typed the following command to clone public repository:
Now I have local repository, FabAcademy Git Site, in My Documents folder
Phase 3. Testing to create and publish a website in remote repository
First I synchronised my local repository with the remote repository. This command is to copy the contents of the remote repository to the local repository. The local repository was updated and it is now the same version with the remote repository.
git pull origin master
First I wanted to remove existing www-page structure from the repository
Next, I wanted to delete almost all files from the repository, because I wanted to use immediately bootstrap UI framework instead of default way to create www-pages. I didn't notice that I should keep .yml file in the repository in order to tell that my pages are written by using html/css. But at this moment, I didn't know anything about that failure which was going to appear later on ;)
Then I should have been using the Git commands to delete recursively folders from the my GitLab remote repository. In practise I did use Windows file manager to remove files and folder and Git integrated to dreamwewaver (see later more) to commit and push changes. My first commit in Git Remote repositotry history is "1st iteration of my webpages"
However, I have added commands below what would have been correct way to do things ;). First I will show how to delete directory from Git
This command will remove directory:
git rm -r one-of-the-directories
This command will commit changes:
git commit -m "Removed directory"
This command will update committed changes to remote server:
git push origin
Next I would tell also to Git that I have deleted files from my local Git folder (root files from my web pages
This command will update committed changes to www-root files remote server:
Add your first version of www-pages to Git repository
Now you can add your first html-page(s) to stage. In practise you save your html-page or image or .. to local Git-folder (in my case FabAcademy Git Site) and with following command(s) you tell to git how to send new file(s) to local Git repository
This command will add all new files to stage (temporar :
git add .
This command will add spesified files to stage:
git add [file name].
Next I made the history snapshot of this version to my local Git repository. This snapshot will be stored in version history (and is available for restoring earlier version of the file if needed)
This command will update version history and commit your file to be pushed into remote repository:
git commit -m “message”
Last thing is to synchronise committed changes of local repository to remote Git repository
This command will update remote repository:
git push origin master
HOX HOX! I did create also my first version of www-site by using Adobe Dreamweaver with integrated Git. So I will show my steps in the section where I describe my www-design steps
Using Git with tools integrated into Adobe Dreamweaver
Pretty soon I found that I have to download and install some web design software in order to speed-up website development. Quite soon I did remember that I have got license to Adobe Creative Cloud, which also include Dreamweaver web design software. However, I wanted to do market analysis about wwww-site development tools. In order to ease burden of this task, I explored only tools, which will have integrated Git.
Phase 1. Market analysis: what kind of www-editors are available which do have integrated Git-integration?
When I started to explore market of the free/freemium www-editors, I aimed at to get collection of the tools which already have Git integration. I found plenty of toos which did fit into my requirements: (source for the list below: https://www.hostinger.com/tutorials/best-html-editors)
Atom: Atom is a free, open-source code editor, and it was developed by the GitHub team. Atom uses a free software license for its package and it is maintained by the GitHub community. It aims to offer a premium feel to the editor while keeping it completely free.
Notepad++: Notepad++ distinguishes its development environment for its simplicity. Notepad++ is super lightweight; there’s even a mobile version if you fancy it.
Sublime Text: Sublime is another excellent free HTML editor. Sublime offers great support to ensure that the program is constantly updated. Users can add plugins made by the community or build their own. We think using the free version of Sublime is more than adequate.
Adobe Dreamweaver CC: Dreamweaver is a premium, powerful, and versatile tool. It gathers to both the back-end and front-end development.(I did choose to this be my tool, because I had Adobe creative Studio license)
Visual Studio Code:Visual Studio Code is a multi-language and multi-platform program. Its development environment works hand in hand with HTML, Python and other popular programming languages.
I knew already that I have commercial option available Adobe Dreamweaver, but I was curious to test also alternatives. However, when I ended up to use Bootstrap 4 template-engine, I pretty soon found that Adobe Dreamweaver does support Bootstrap natively. I did stop my testing and decided to skip alternatives and use Dreeamweaver.
Phase 2. Description of Dreamweaver's Git integration
Main layout of the Dreamweaver does consist of the main window and set of panels. I have used to use layout configuration which does consist of two main components:
main edit window where I write and edit code
Git panel where I commit changes and push my changes to remote repository
Warning! You can view Git panel in Dreamweaver only after you download the Git client in your computer.
Getting started with Git in Dreamweaver
Perform the following steps to get started with Git in Dreamweaver:
Download the Git client for your Operating System. (done, check documentation above)
Create an account for your Git client. (done, check documentation above)
If you already have a Git account, provide your login credentials to sign in to your Git client.
The Git Panel
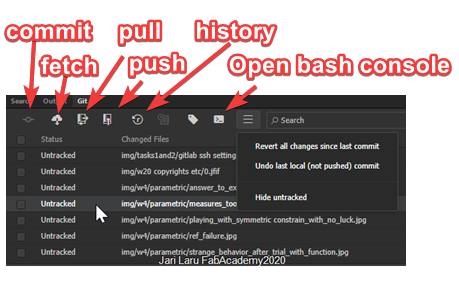
Dreamweaver supports Git operations through the Git panel (Windows > Git). Git panel does have all same basic commands than have Git for Windows Bash console and graphical UI offer (and other Git clients also). My normal usage of Git panel is like follows: (to see more detailed documentation about panel, go here: https://helpx.adobe.com/dreamweaver/using/git-support.html)
Choose files to be commited (click checkbox at the front of each file)
Click commit button
Push files by clicking push button
Associate your site with Git
You can associate your Dreamwaver website with a Git repository either by creating a repository or by cloning an existing repository. When you initialize or create a repository, an empty Git repository is created in your current working directory, with a .gitignore file in the folder.
However, when you clone an existing Git repository, all the files from your parent repository are cloned to your local system.
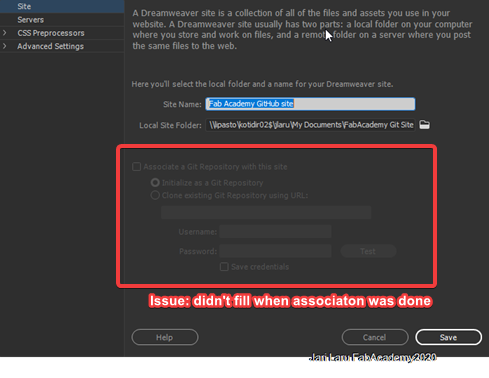
Well, in the context of my Dreamweaver www-site, I did follow my own (erranous) path of the using Git integration. I have done these phases before choosing dreamweaver to be my www-editor by using Git for Windows.
I didn't understand Git-behaviour very deeply in that moment, so I didn't tick the box "associate this site with Git repository and fill the credentials"
The price that I had to pay about that is the fact, that now I have to fill credentials each time when I am using Git on Dreamweaver. SSH-keys are not supported in Dreamweaver at the moment, but credentials coud be stored in this dialog anyway
Using Bootstrap UI framework and Dreamweaver for documenting the activities
I didn't test how to create www-pages and upload it, because I was already familiar with css and www-syntax (I have done a lot of www-pages for non-profit and profit purposes). So, I started by exploring pages done by FabAcademy alumnis. I was especially curious to check my students' pages who passed FabAcademy in 2018.
Both Kati Pitkänen and Megumi Iwata had pretty nice looking pages, so I did look source code of their pages in order to see syntax and also read documentation to understand how they have done such nice looking pages. My previous knowledge about handmade www-pages was over 15 years old, when I did design pages for different organizations and groups by using CSS and HTML and newer experiene of using different kind of wysiwyg-www-platforms like Wordpress, Drupal, Mediawiki etc.
"Ahaa! WOw! I said when I did learn that they have used Bootstrap html5-framework in their FabAcademy documentation. Bootstrap is responsive platform, which is described by me in the forthcoming sections and video below:
Bootstrap UI template used in my FabAcademy2020 documentation
Because I didn't want to code my www-site from the scratch, I decided to explore collection of the available bootstrap templates. Pretty soon I found MULTI - Multipurpose Bootstrap 4 theme by Bootstrapius, which was simple and customizable template, just good for my pruposes.
Major features of Multi Bootstrap 4 template are:
Homepage jumbotron
Great icon fonts
Gallery/portfolio section with lightbox
Styled Google Map
Section with features/services
Prestyled signup form (no backend included though)
Most of the features listed above are related to core technologies of modern www-pages.
Responsive pages (looks beatiful in any size of screens) and latest html and css are important for me, because I am pretty experienced www-designer.
Layout elements
Well done template (Multi by Bootstrapius on my case) it's important asset, because template quite often have basic layout settings done already. This does mean that I didn't need to consume my time to think how to use Bootstrap UI layout components for creating responsive layout. See the documentation if you are curious about creating layout from the scrach or finetuning existing template: https://getbootstrap.com/docs/4.5/layout/overview/
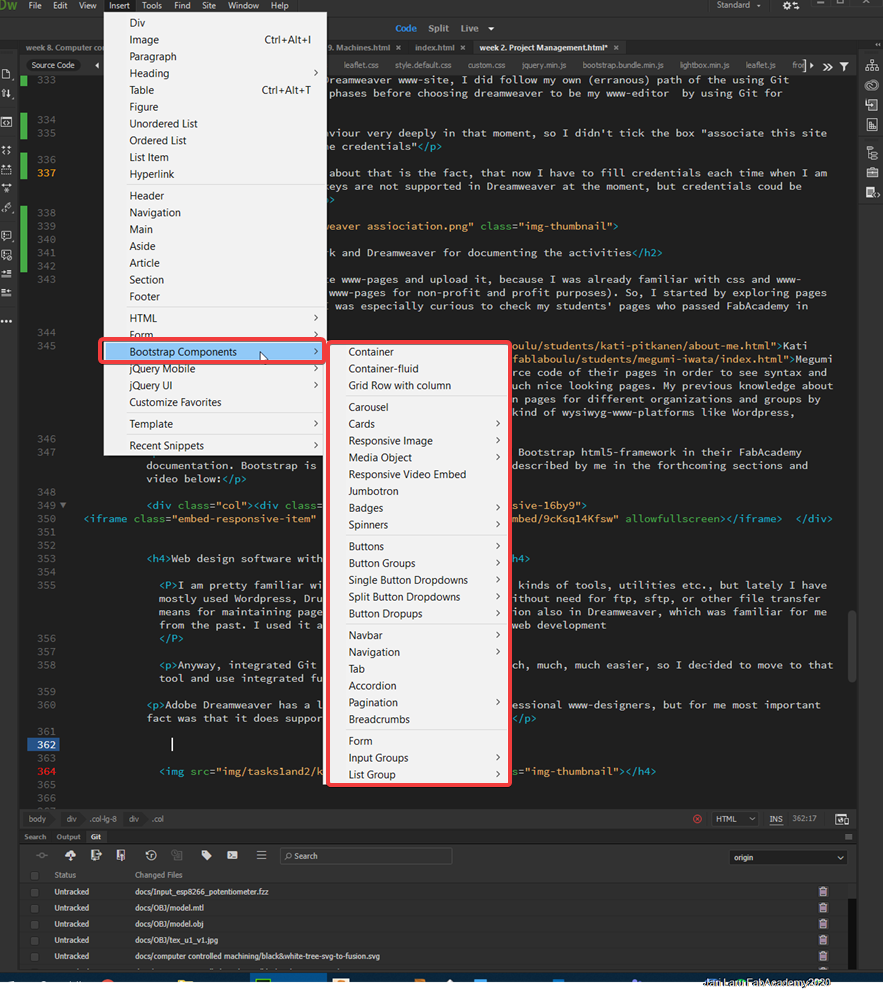
Content and components
Content equals the text, headings, images etc. In the Bootstrap, content can be formatted by using extensive component library. Such components can be called just by using simple css-classes
A simple primary alert with an example link. Give it a click if you like.
<divclass="alert alert-primary"role="alert">
A simple primary alert with <ahref="#"class="alert-link">an example link</a>. Give it a click if you like.
</div>
Web design software with integrated Git: Dreamweaver
I am pretty familiar with web design, I have used all kinds of tools, utilities etc., but lately I have mostly used Wordpress, Drupal etc. php+mysql platforms without need for ftp, sftp, or other file transfer means for maintaining pages itself. So Git was new function also in Dreamweaver, which was familiar for me from the past. I used it aproximatelyu 20 years ago for web development
Anyway, integrated Git made my website development much, much, much easier, so I decided to move to that tool and use integrated functions and features
Adobe Dreamweaver has a lot of different tools for professional www-designers, but for me most important fact was that it does support Bootstrap 4.0 UI framework.
Debugging: My site is not visible. Where is the issue?
I was pretty much surprised that my new html-site didn't show up, instead there was error message (I don't remember anymore, what it was).
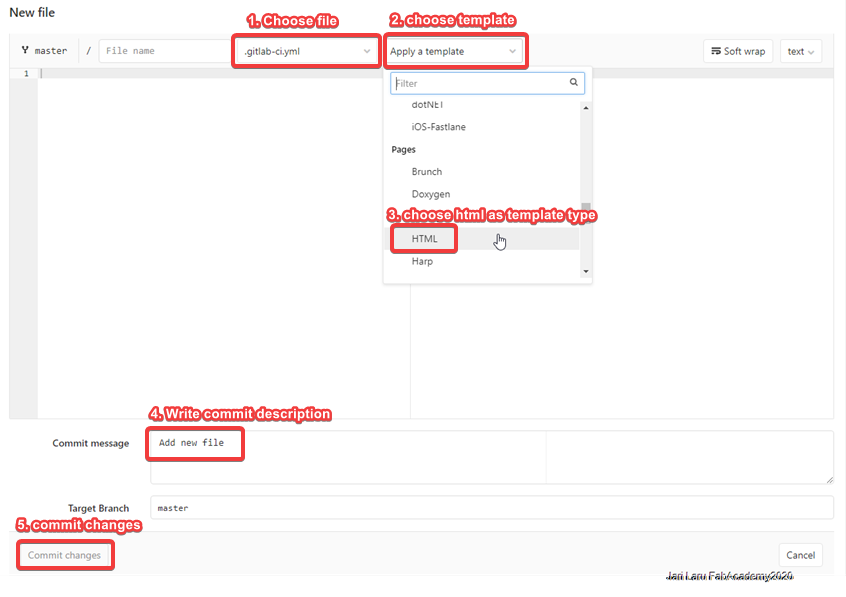
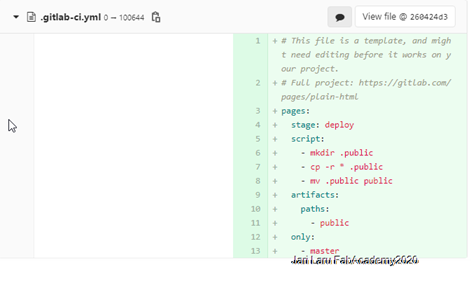
Before doing anything more, I just thought that I had Git issue or something ;-). Eventually I found that in this system www-root should be .gitlab-ci.yml file, which is like .htaccess in "normal www-sites". Content of this CI/CD pipeline configuration will tell the server that how files pushed via Git should be handled in the server-side.
I got my site running (after I got hint from Ivan Sanchez) when I went to my GitLab repository page and did choose: +/new file/select template type: .gitlab-ci.yml